

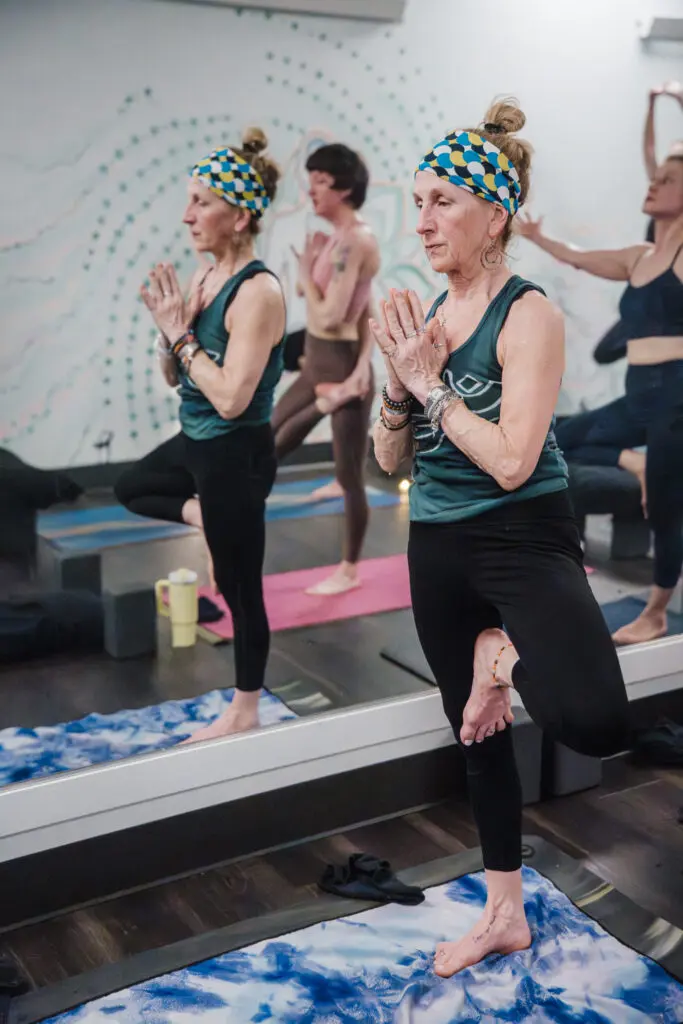
Balance Without Forcing It: A Friendlier Way Into Tree Pose
Tree pose does not require you to stand perfectly still. A useful beginner practice is to choose a version in which you can breathe, feel your standing foot, and respond when your balance changes. That might mean keeping your lifted toes on the floor, placing your foot at your calf, or using a wall. Each version is tree pose. The point is not to force your body into a shape; it is to practice steadiness with enough ease to stay curious.
Balance is a response, not a pose you capture
Your balance changes from one side to the other and from one day to the next. Sleep, attention, fatigue, a busy mind, and even where you look can change the experience. That variability is not evidence that you are bad at balancing. It is the very material you are practicing with.
Instead of asking, Can I hold tree?, try asking, Can I notice what helps me feel organized right now? That question makes room for a softer knee, a lower foot, a hand on the wall, or an early exit. It also keeps tree pose from becoming a performance.
Build the pose from the ground up
Begin in a comfortable standing position. Feel three points under your standing foot: the base of the big toe, the base of the little toe, and the heel. You do not need to grip the mat with your toes. Let them spread and allow the whole foot to participate.
Shift your weight gradually into one leg. Keep a small bend in that knee if locking it makes you feel rigid. Turn the other knee outward only as far as your pelvis can stay mostly facing forward. Then choose one of these versions:
- Kickstand tree: Keep the ball of the lifted foot on the floor and rest the heel lightly near the standing ankle.
- Low tree: Place the sole of the lifted foot against the inner calf, avoiding the knee.
- Higher tree: If it is comfortable and steady, guide the foot to the inner thigh with your hand. Skip this version if reaching for the foot changes your balance or strains your hip.
Hands can stay at your hips, meet at your chest, reach outward, or touch a wall. None of those choices makes the pose more or less legitimate.
Try this five-step tree pose practice
- Choose support first. Stand within fingertip distance of a wall. Decide before you begin that touching it is part of the plan, not a rescue.
- Set your gaze. Pick a still point at eye level or slightly lower. A calm gaze often gives the balance system clearer information.
- Take the kickstand. Stay for three easy breaths. Notice whether your standing toes are gripping and soften them if possible.
- Experiment, do not escalate. Move the foot to the calf only if your breath and face remain relaxed. Return it to the floor whenever you want.
- Reset between sides. Stand on both feet, shake out your legs, and notice the difference before practicing the second side.
Two thoughtful rounds usually teach you more than one long hold fueled by tension. If the wall helps you feel the action of the standing leg more clearly, keep using it.
What to do when you wobble
First, put your foot down. That simple response is a skill. Then check one variable at a time: Is your gaze moving? Are you holding your breath? Did your lifted knee travel farther outward than your hip wanted? Are you pressing the foot and standing leg against each other so hard that your whole body becomes stiff?
Try again with less effort. A smaller shape often creates more useful awareness. You can also practice the weight shift without lifting the foot at all. Balance develops through repeated, manageable conversations with the floor—not by refusing to step out.
Bring the same approach into class
A teacher-led room gives you options you may not notice on your own. Review Vitara’s class descriptions to find a pace that gives you room to learn, or read the beginner hot yoga guide before your first visit. In any class, you can take the kickstand, use the wall, or skip a balance entirely.
Frequently asked questions
Where should I put my lifted foot?
Use the floor, inner ankle, calf, or inner thigh. Avoid pressing directly into the side of the standing knee. Choose the height that lets you breathe and control your exit.
Why is one side easier?
Side-to-side differences are common. Treat each side as its own practice instead of making the less steady side imitate the other one.
Should I squeeze everything to balance?
Some muscular engagement helps, but maximum tension can make the pose brittle. Aim for a steady standing leg, a responsive foot, and enough softness to breathe.